Here's step-by-step tutorial to design a simple hero section for a modern personal portfolio website (a common first project).
Tools You’ll Use in Figma
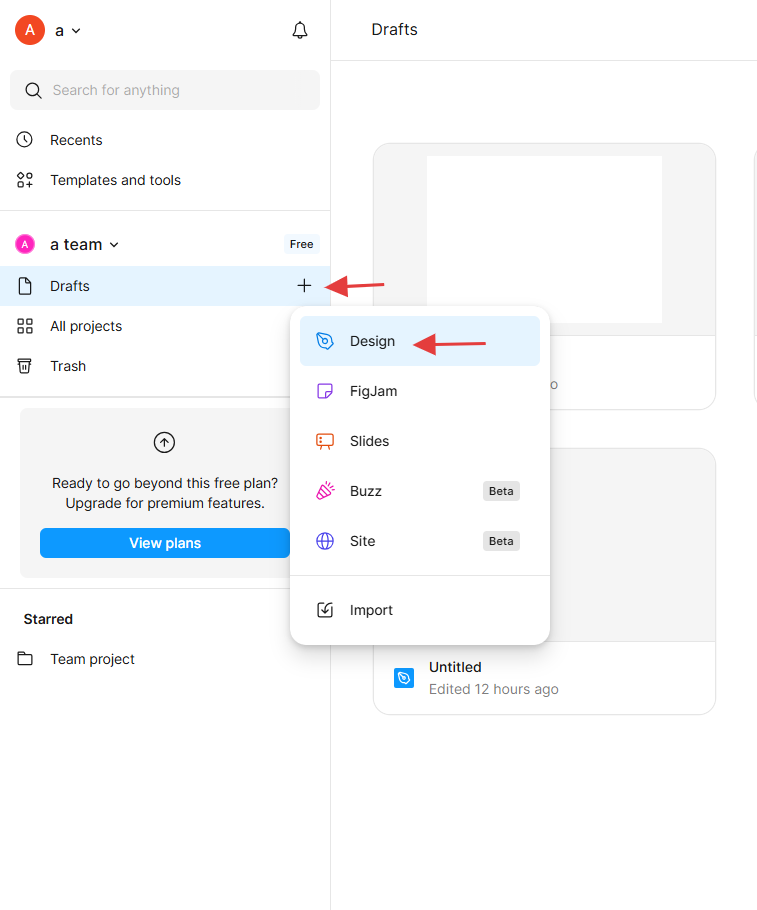
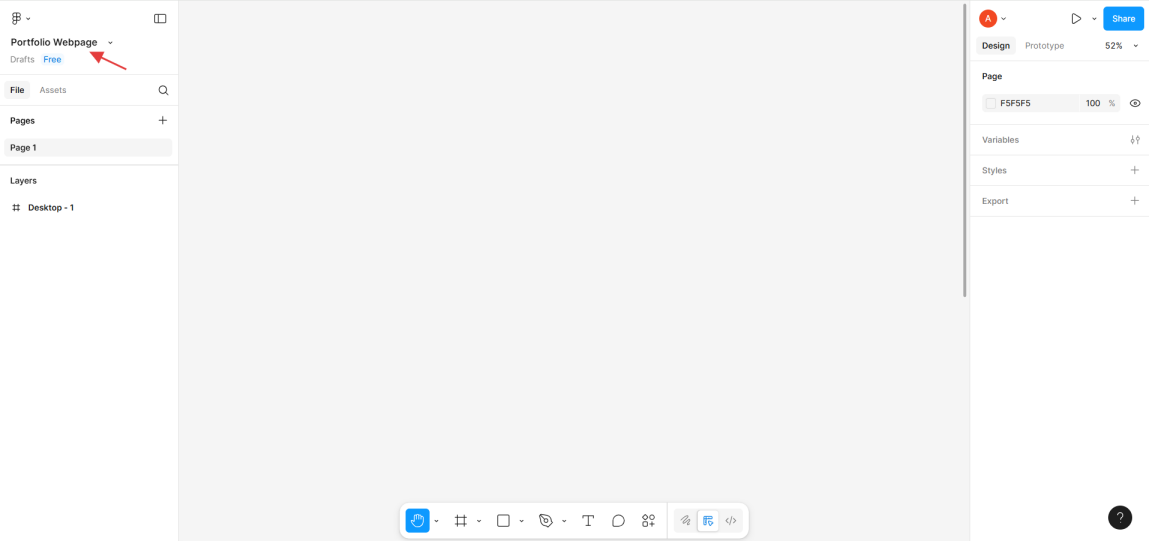
Step 1: Create the Page
1. Open your Figma file.
2. Click the “+” icon at the top-left to create a new page.
3. Name it something like "Portfolio Webpage".
Step 2: Set Up the Main Frame
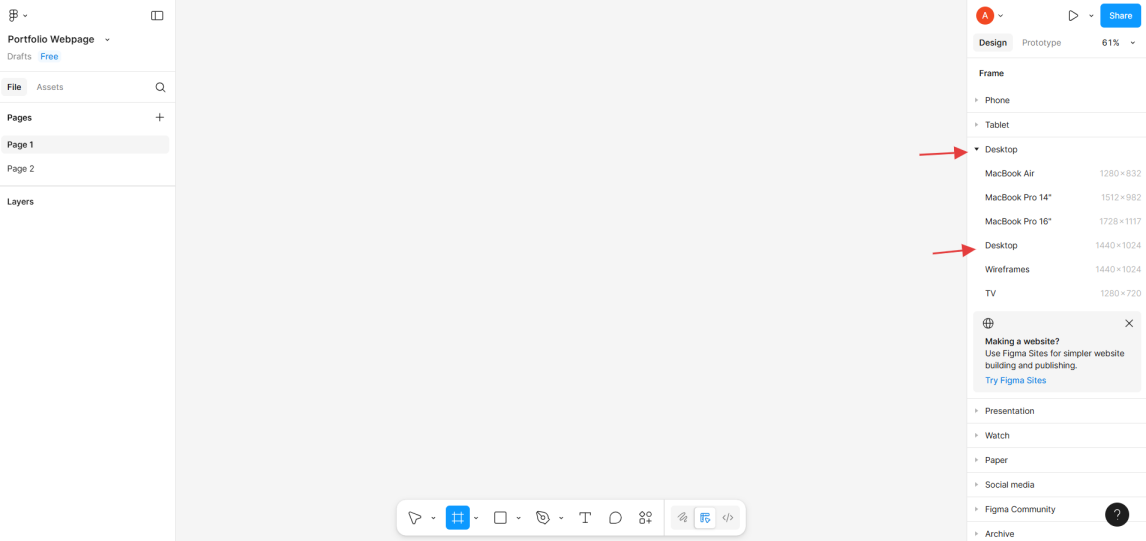
1. Press F on your keyboard or click the Frame tool in the toolbar.
2. In the right panel, select Desktop, Draw the frame on your canvas.
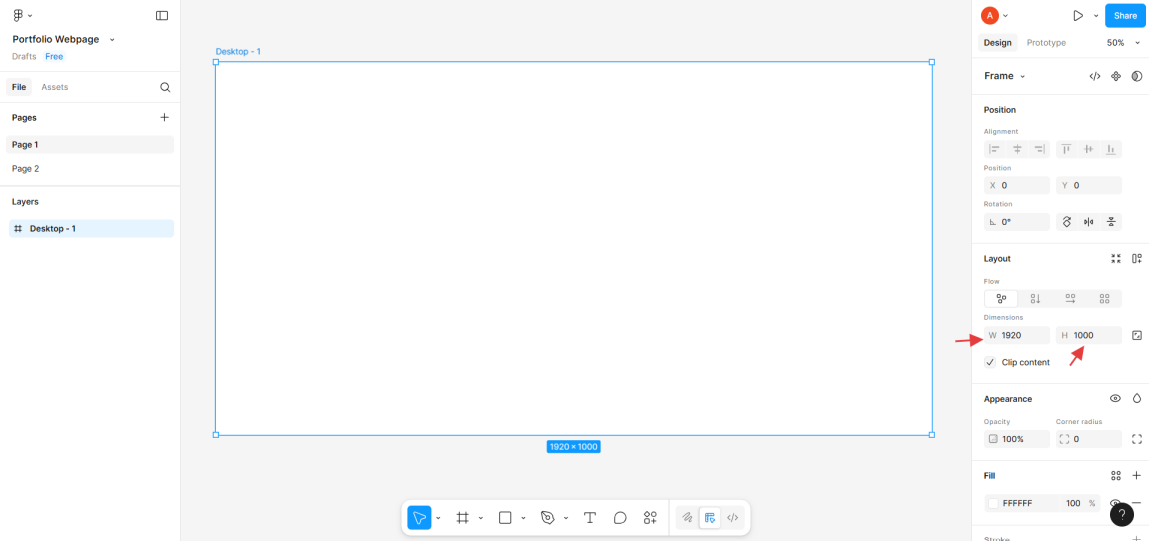
3. Type 1920 width and 1000 height manually.
This will be the container for your website layout.
Step 3: Add a Background Color
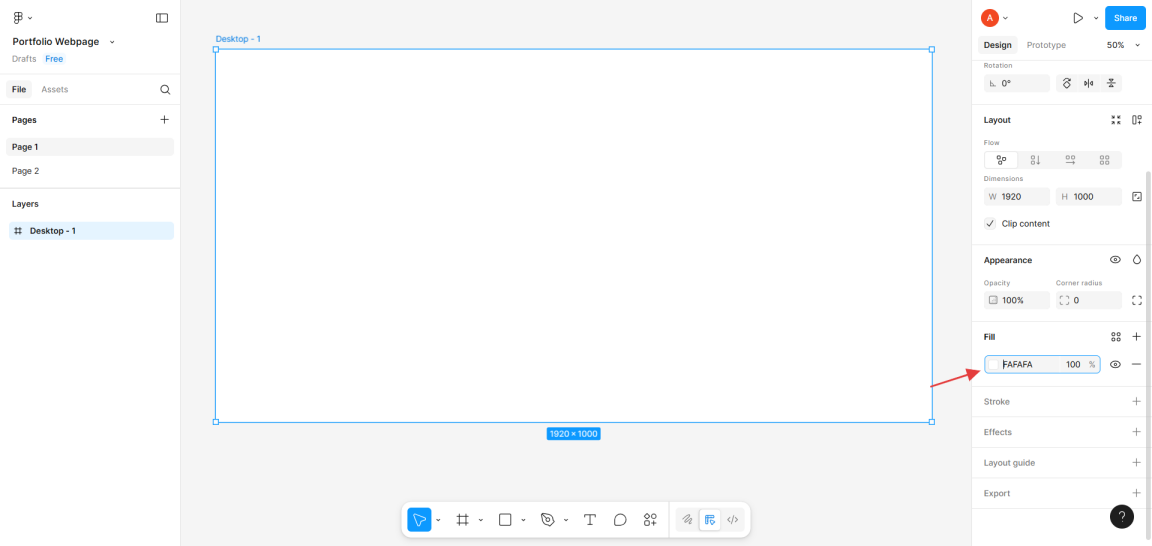
1. Select your main frame.
2. On the right panel under "Fill", choose a light background, e.g., #FAFAFA or white.
Step 4: Create a Navbar
1. Press R or use the Rectangle tool .
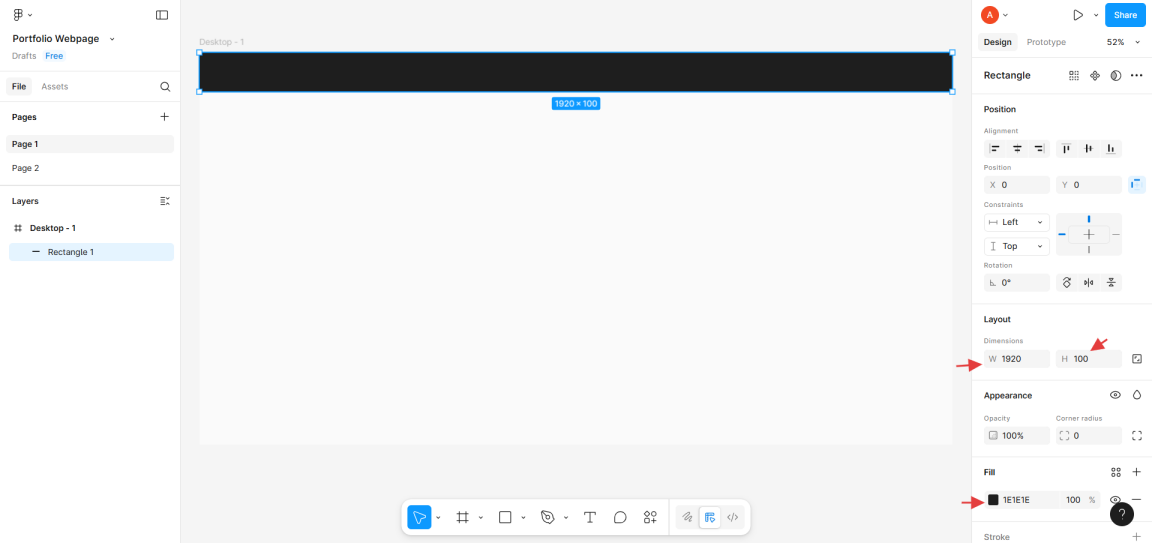
2. Draw a rectangle at the top of the frame – about 100px high and full width (1920).
3. Fill it with a contrasting color like #1E1E1E.
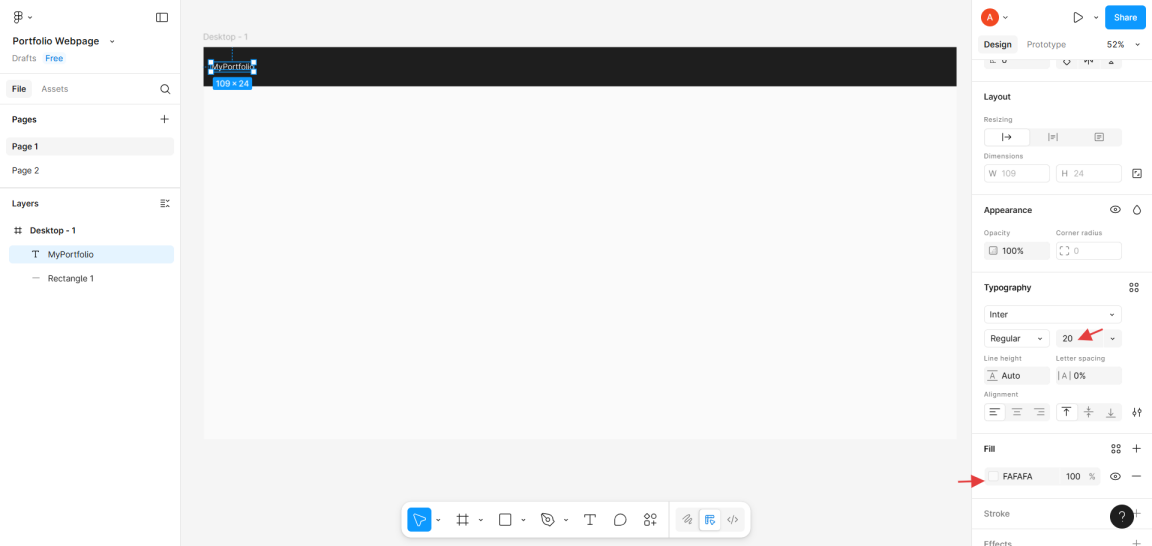
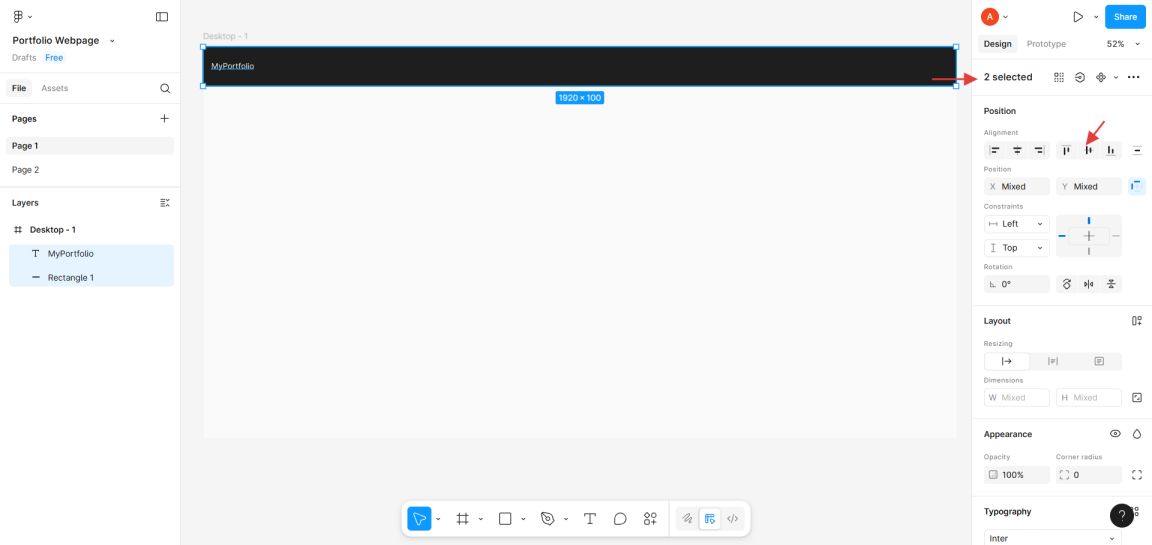
4. Add some Text : Type “MyPortfolio” using the T tool (Press T).
5. Style the text:
Step 5: Add a Hero Section
The hero section is usually the main landing area of a website.
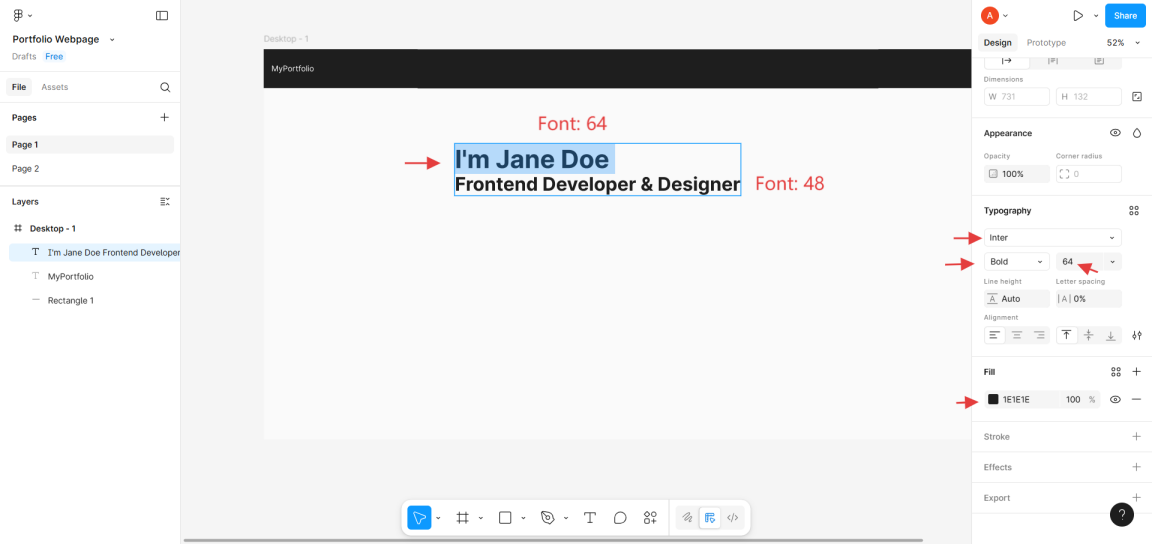
A. Add a Title
1. Use the T key to add a headline like:
"I'm Jane Doe
Frontend Developer & Designer"
2. Font:
B. Add a Subtitle
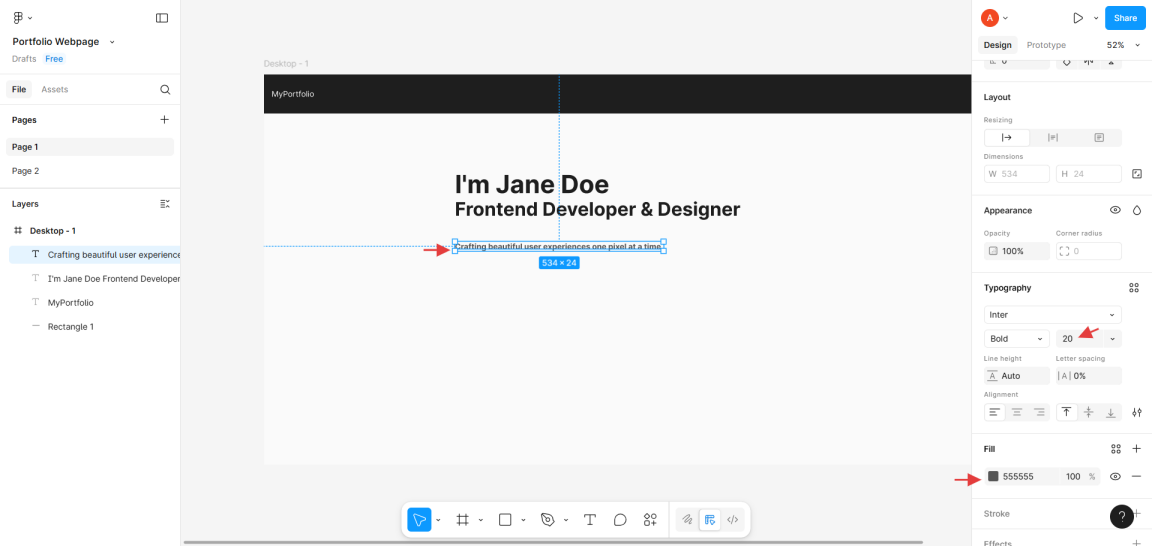
1. Below the title, add a smaller paragraph:
"Crafting beautiful user experiences one pixel at a time."
2. Font size: 20, color: #555555
C. Add Buttons (Call-to-Action)
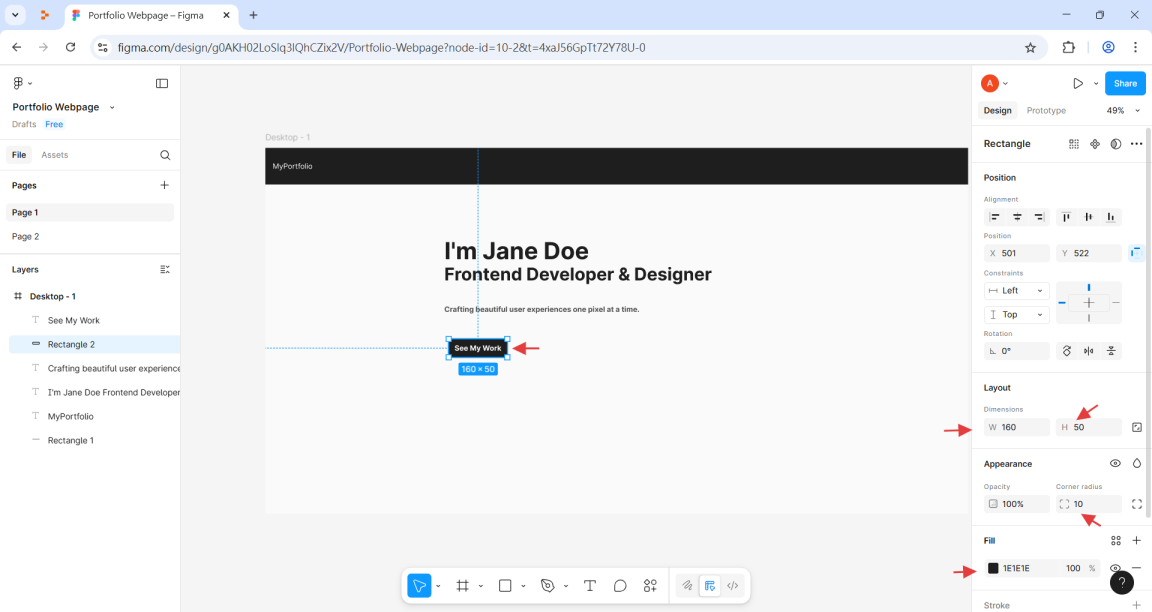
1. Press R -> draw a rectangle ~`160x50`.
2. Apply corner radius (use the corners slider).
3. Fill: #1E1E1E
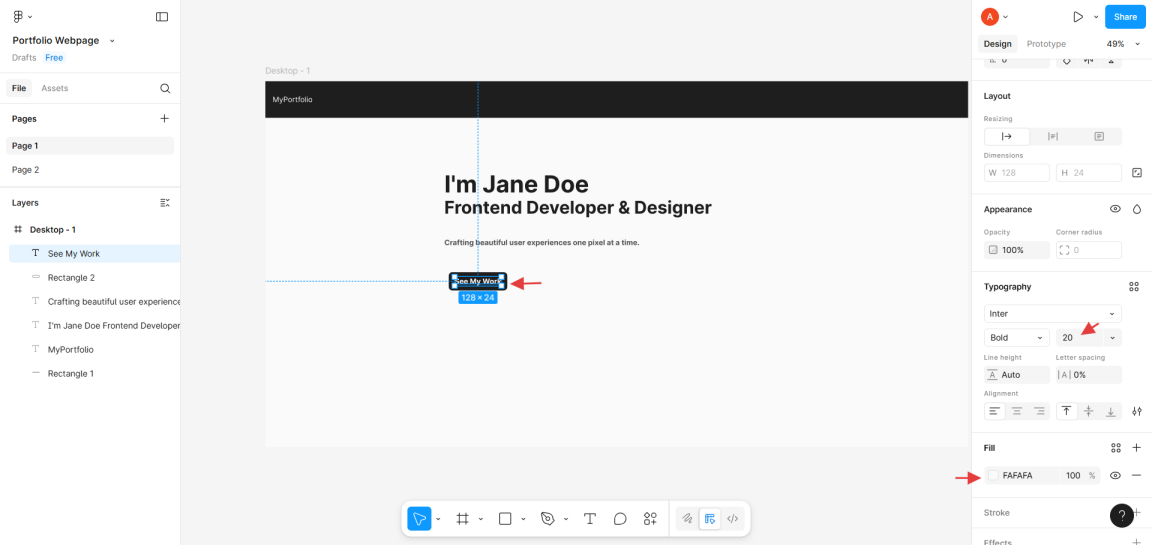
4. Add text: “See My Work”, and Text color: white
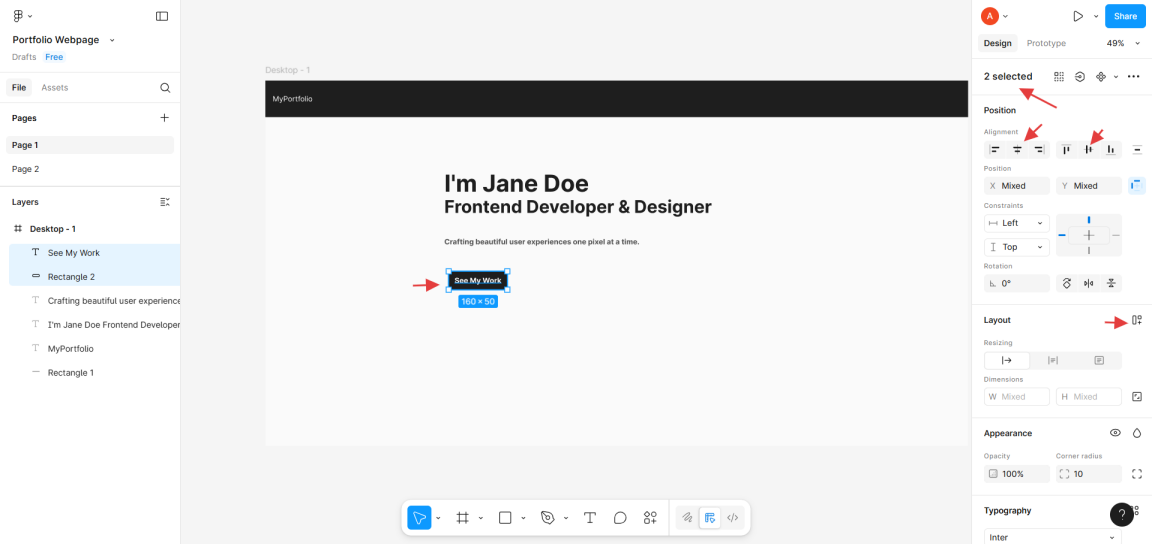
5. Select both button and text -> Right-click -> "Add auto layout" or click "Use Auto Layout" at right panel
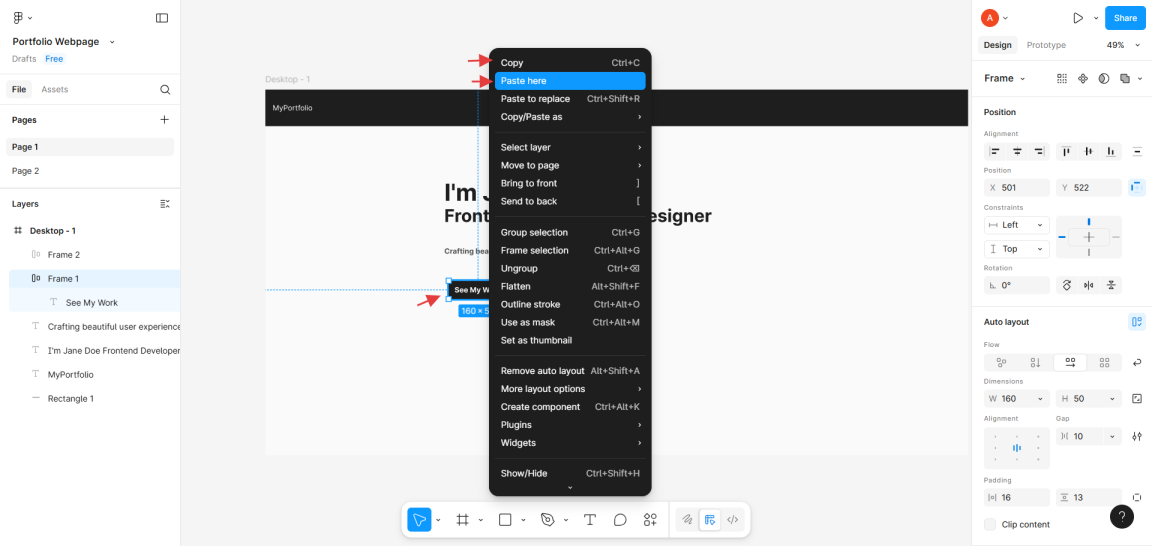
6. Duplicate the button (ctrl + V) and change to “Contact Me”
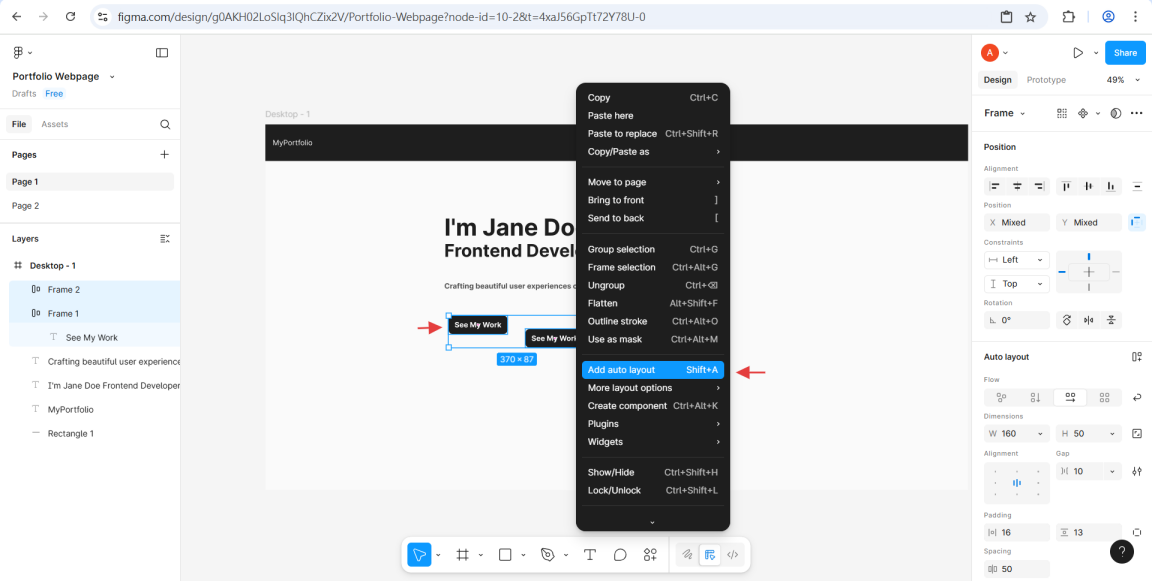
7. Select both two buttons -> Use Auto Layout to align buttons neatly
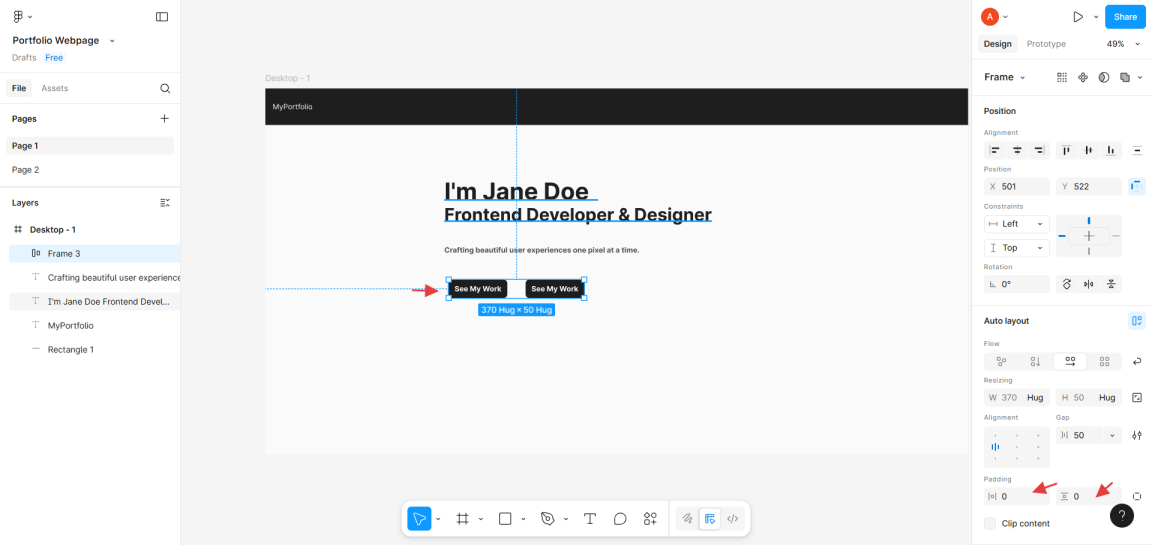
8. Adjust spacing between them using the right panel
Step 6: Add an Image Placeholder
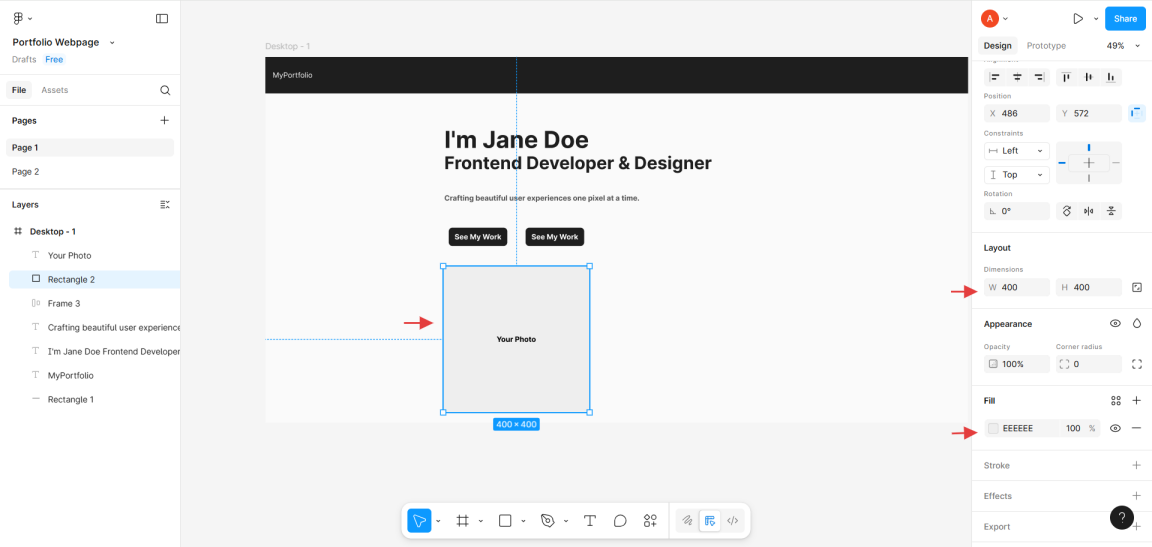
1. Use R to create a rectangle (e.g., 400x400) to the right of your text.
2. Fill it with a light gray (like #EEEEEE)
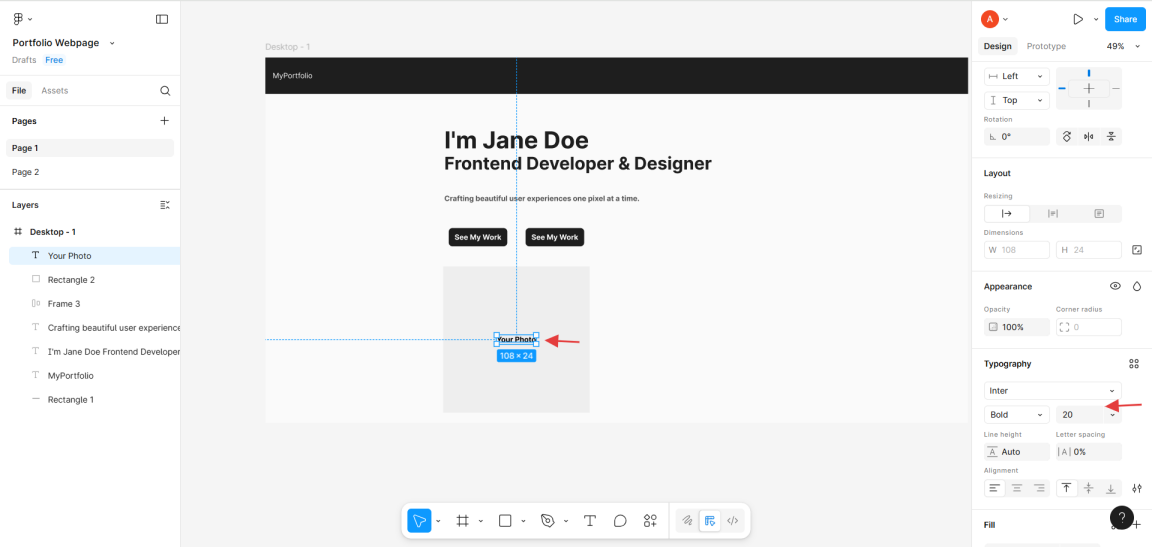
3. Optional: Add text inside: "Your Photo"
4. You can later replace this with a real image.
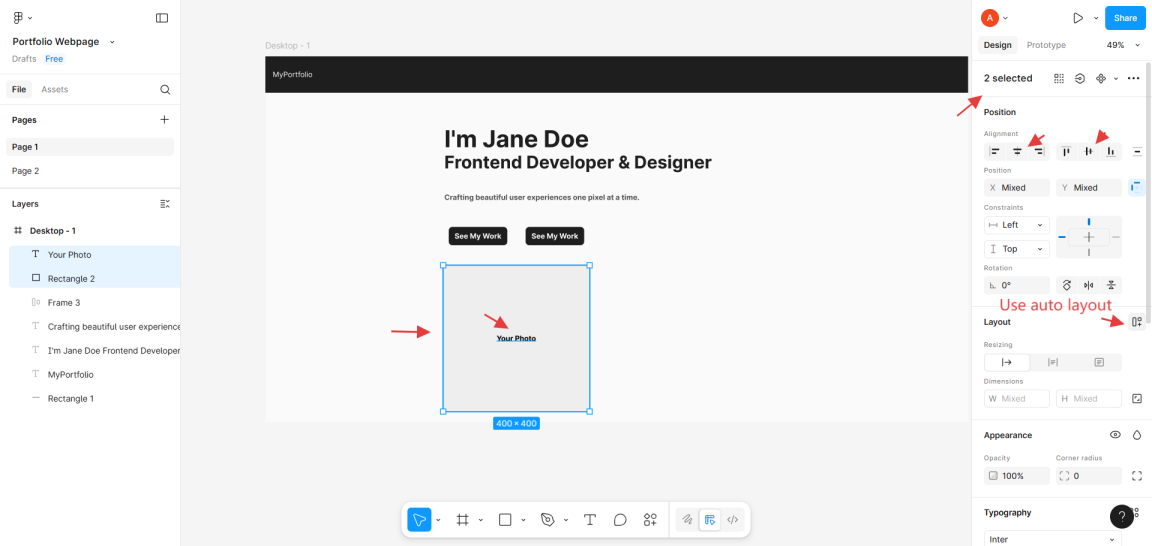
5. Select both rectangle (Image Placeholder) and text -> Position -> Alignment -> Click "Horizontal Center" and "Vertical Center"
6. Select both rectangle (Image Placeholder) and text -> Right-click -> "Add auto layout" or click "Use Auto Layout" at right panel
7. Use Auto Layout to align Image Placeholder neatly
Step 7: Arrange Everything with Auto Layout (Optional)
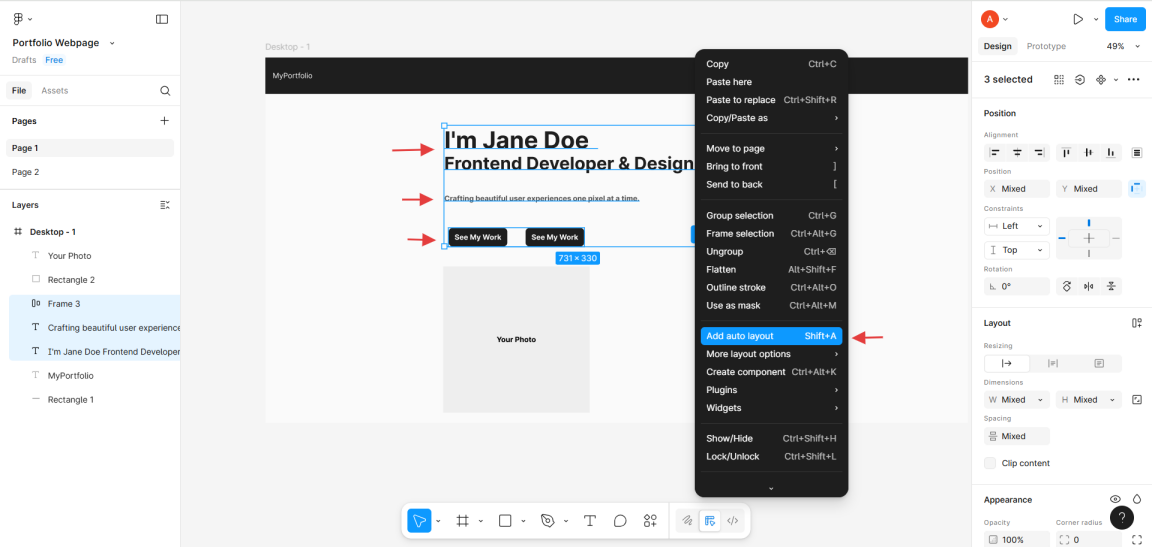
Group related elements like the title + subtitle + buttons together:
1. Select all three elements.
2. Right-click -> Create Auto Layout
3. Use padding and spacing settings to space them nicely.
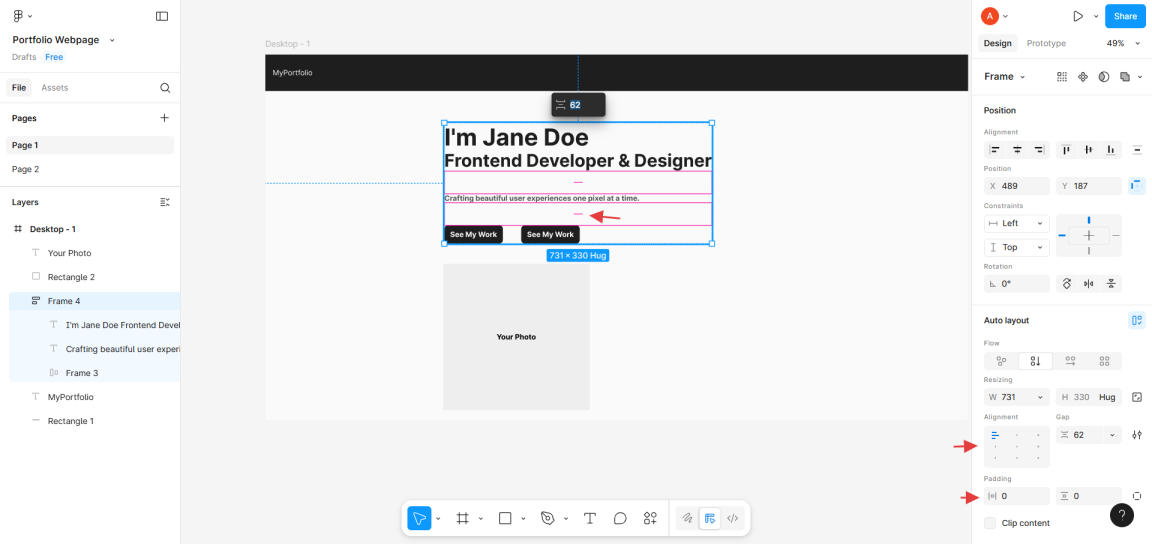
Final Touches
Tools You’ll Use in Figma
- Frame tool
- Rectangle tool
- Text tool
- Auto Layout
Step 1: Create the Page
1. Open your Figma file.
2. Click the “+” icon at the top-left to create a new page.
3. Name it something like "Portfolio Webpage".
Step 2: Set Up the Main Frame
1. Press F on your keyboard or click the Frame tool in the toolbar.
2. In the right panel, select Desktop, Draw the frame on your canvas.
3. Type 1920 width and 1000 height manually.
This will be the container for your website layout.
Step 3: Add a Background Color
1. Select your main frame.
2. On the right panel under "Fill", choose a light background, e.g., #FAFAFA or white.
Step 4: Create a Navbar
1. Press R or use the Rectangle tool .
2. Draw a rectangle at the top of the frame – about 100px high and full width (1920).
3. Fill it with a contrasting color like #1E1E1E.
4. Add some Text : Type “MyPortfolio” using the T tool (Press T).
5. Style the text:
- Size: 20
- Color: White
- Align: Left side inside navbar
Step 5: Add a Hero Section
The hero section is usually the main landing area of a website.
A. Add a Title
1. Use the T key to add a headline like:
"I'm Jane Doe
Frontend Developer & Designer"
2. Font:
- Font: Inter (default in Figma)
- Size: 64 for the first line, 48 for the second
- Weight: Bold
- Color: #1E1E1E
B. Add a Subtitle
1. Below the title, add a smaller paragraph:
"Crafting beautiful user experiences one pixel at a time."
2. Font size: 20, color: #555555
C. Add Buttons (Call-to-Action)
1. Press R -> draw a rectangle ~`160x50`.
2. Apply corner radius (use the corners slider).
3. Fill: #1E1E1E
4. Add text: “See My Work”, and Text color: white
5. Select both button and text -> Right-click -> "Add auto layout" or click "Use Auto Layout" at right panel
6. Duplicate the button (ctrl + V) and change to “Contact Me”
7. Select both two buttons -> Use Auto Layout to align buttons neatly
8. Adjust spacing between them using the right panel
Step 6: Add an Image Placeholder
1. Use R to create a rectangle (e.g., 400x400) to the right of your text.
2. Fill it with a light gray (like #EEEEEE)
3. Optional: Add text inside: "Your Photo"
4. You can later replace this with a real image.
5. Select both rectangle (Image Placeholder) and text -> Position -> Alignment -> Click "Horizontal Center" and "Vertical Center"
6. Select both rectangle (Image Placeholder) and text -> Right-click -> "Add auto layout" or click "Use Auto Layout" at right panel
7. Use Auto Layout to align Image Placeholder neatly
Step 7: Arrange Everything with Auto Layout (Optional)
Group related elements like the title + subtitle + buttons together:
1. Select all three elements.
2. Right-click -> Create Auto Layout
3. Use padding and spacing settings to space them nicely.
Final Touches
- Make sure everything is aligned properly using the blue alignment guides.
- Use consistent spacing and font sizes.
- for the further development, you can add shadows or icons (import from Figma Community or use LottieFiles plugins).


